


远程抓包利器AnyProxy
AnyProxy官网:https://anyproxy.io/
Github地址:https://github.com/alibaba/anyproxy
一、介绍
AnyProxy是阿里巴巴基于 Node.js 开发的一款开源代理服务器。做为中间代理服务器,它可以收集所有经过它的http请求流量(包括https明文内容);它提供了友好的web界面,便于直观的查看经过它的http请求;同时它支持二次开发,可以用javascript控制整个代理的全部流程,便于前端调试和收集http请求页面内容。它可以用于移动app和移动web页面调试、 抓取。
二、使用场景
-
1、浏览器抓包
-
2、手机抓包
-
3、远程抓包
三、搭建
-
安装Node.js
# ubuntu apt install nodejs # centos yum install nodejs # mac brew install nodejs -
安装AnyProxy
npm install -g anyproxy -
生成RootCA
anyproxy --root -
启动
- 启动AnyProxy
root@TYUv1wCiQhsydx:~# anyproxy [AnyProxy Log][2022-09-17 06:52:50]: Http proxy started on port 8001 [AnyProxy Log][2022-09-17 06:52:50]: web interface started on port 8002- 启动AnyProxy,并解析所有
https请求
root@TYUv1wCiQhsydx:~# anyproxy --intercept [AnyProxy WARN][2022-09-17 06:54:16]: ROOT CA NOT INSTALLED YET [AnyProxy Log][2022-09-17 06:54:16]: The root CA file path is: /root/.anyproxy/certificates/rootCA.crt [AnyProxy Log][2022-09-17 06:54:19]: Http proxy started on port 8001 [AnyProxy Log][2022-09-17 06:54:19]: web interface started on port 8002- 启动AnyProxy,并解析所有
WebSocket请求
root@TYUv1wCiQhsydx:~# anyproxy --ws-intercept
[AnyProxy Log][2022-09-17 06:56:44]: Http proxy started on port 8001
[AnyProxy Log][2022-09-17 06:56:44]: web interface started on port 8002
四、规则启动
-
编写规则
// file: sample.js module.exports = { summary: 'a rule to hack response', *beforeSendResponse(requestDetail, responseDetail) { if (requestDetail.url === 'http://httpbin.org/user-agent') { const newResponse = responseDetail.response; newResponse.body += '- AnyProxy Hacked!'; return new Promise((resolve, reject) => { setTimeout(() => { // delay resolve({ response: newResponse }); }, 5000); }); } }, }; -
启动AnyProxy,加载规则
anyproxy --rule sample.js -
测试规则
# 用curl测试 curl http://httpbin.org/user-agent --proxy http://127.0.0.1:8001 # 用浏览器测试: # 配置浏览器http代理为 127.0.0.1:8001,访问 http://httpbin.org/user-agent # 经过代理服务器后,期望的返回如下 { "user-agent": "curl/7.43.0" } - AnyProxy Hacked! -
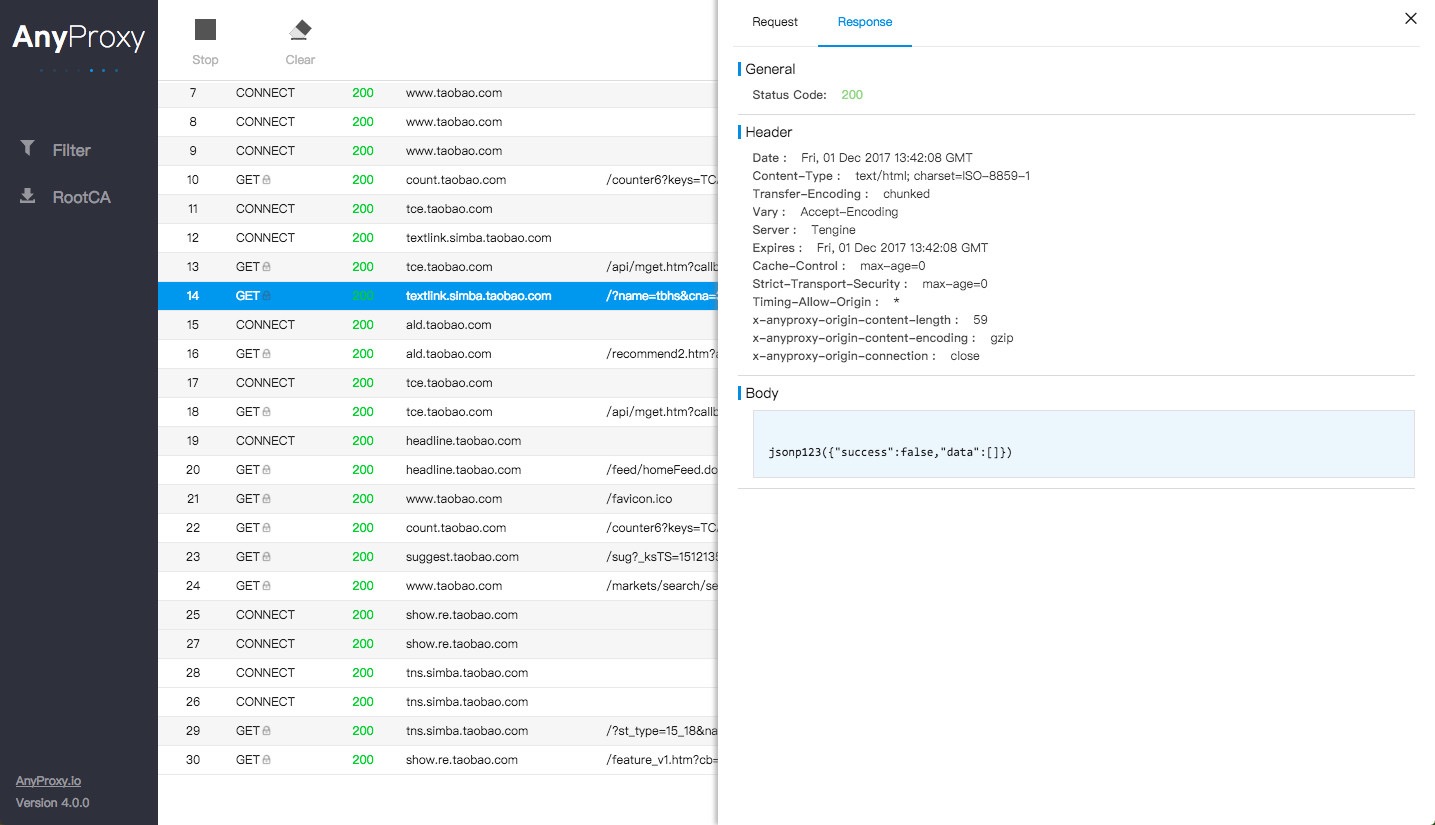
查看请求信息
浏览器访问http://127.0.0.1:8002 ,界面上能看到刚才的请求信息 -
其它
# 如下几种方案都可以用来引用规则模块:

# 使用本地路径
anyproxy --rule ./rule.js

# 使用在线地址
anyproxy --rule https://sample.com/rule.js

# 使用npm包
# AnyProxy使用require()加载本地规则,你可以在参数里传入一个本地的npm包路径,或某个全局安装的npm包
anyproxy --rule ./myRulePkg/ #本地包
npm i -g myRulePkg && anyproxy --rule myRulePkg #全局包
六、安装CA证书、连接
看官方文档有详细的流程
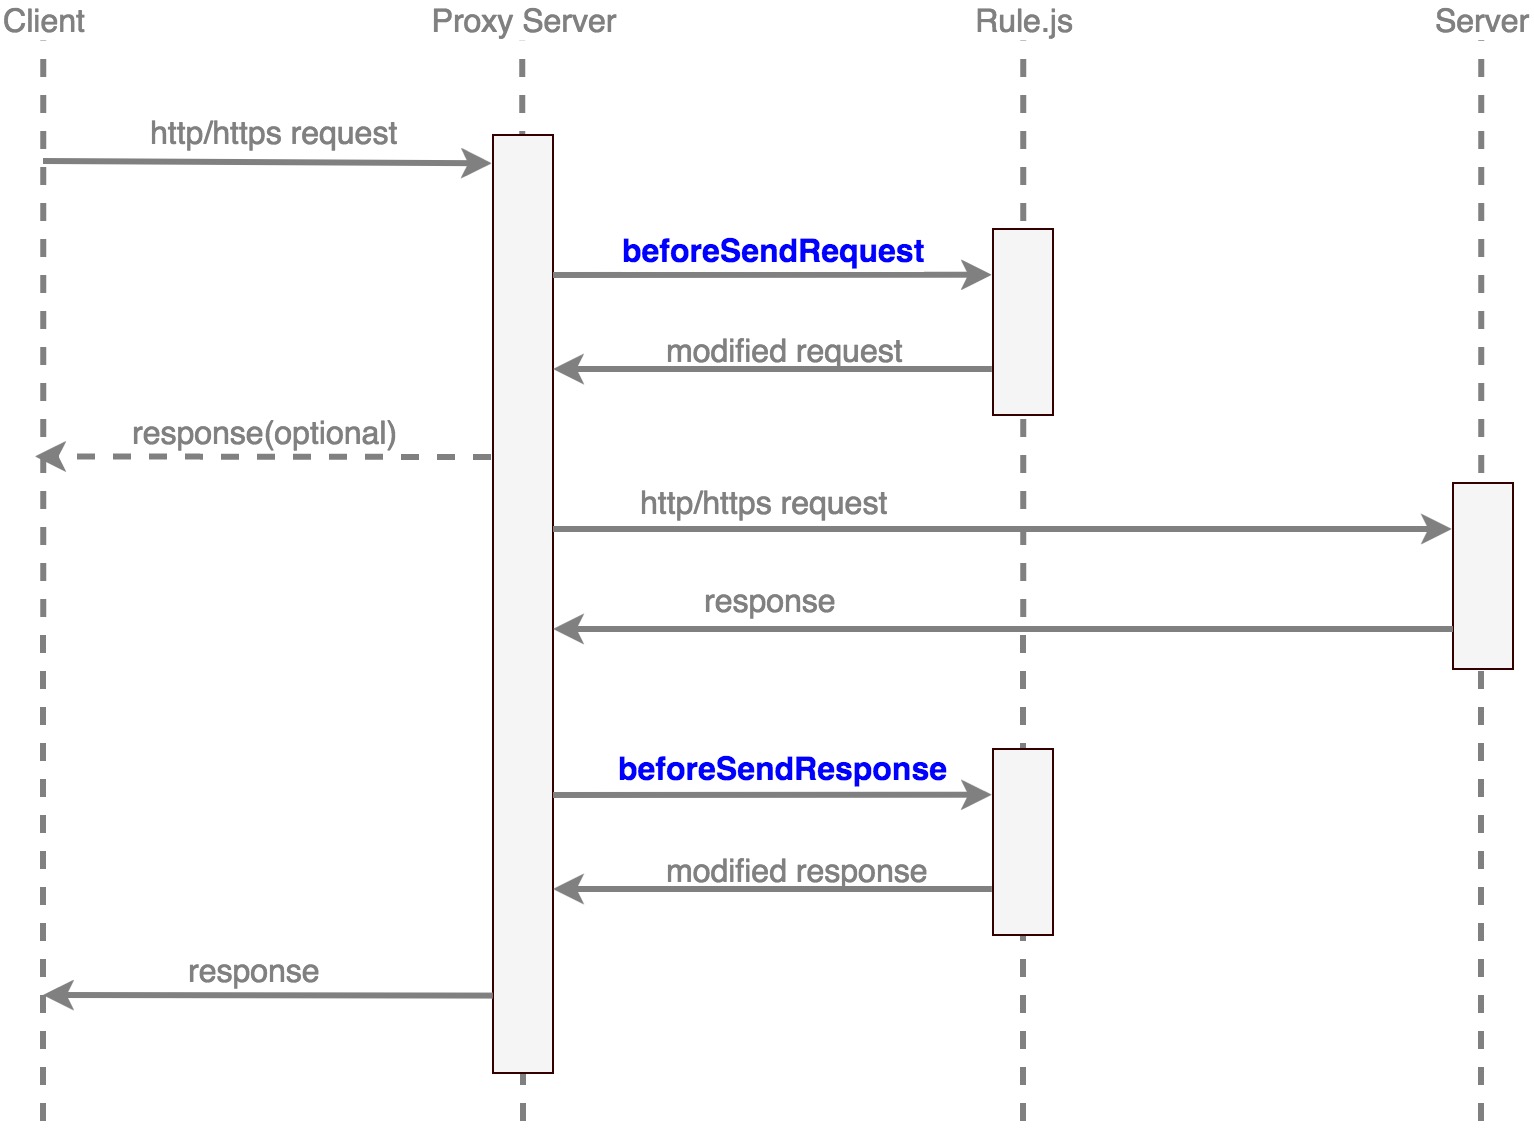
八、处理流程
评论区